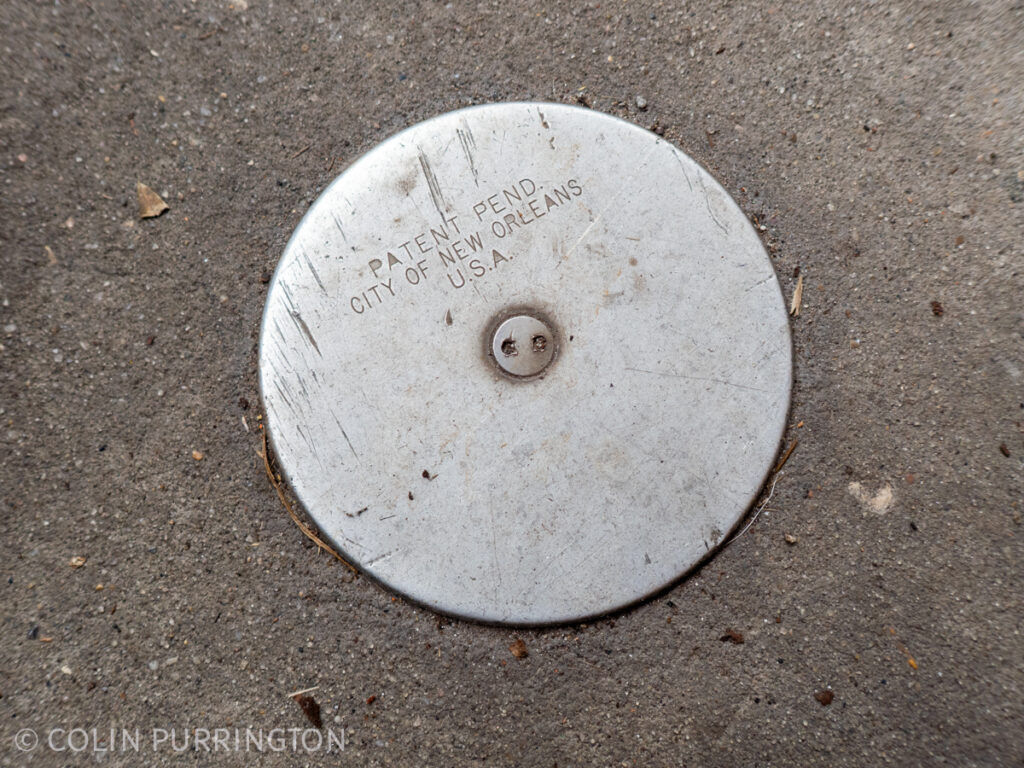
In honor of Mardi Gras I thought I’d make a short post about the small circular metal plates on sidewalks (banquettes) in the French Quarter of New Orleans. When I visited there in February, I initially thought they were surveyor control points or property markers, but that made no sense because there were sometimes a dozen per block, plus the bolts in the center seem to show signs of wear and tear as if they were being used a lot. A reverse image search quickly revealed they had something to do with termites, specifically the introduced species, Coptotermes formosanus, that arrived sometime on or before 1957. Details below (as it were).
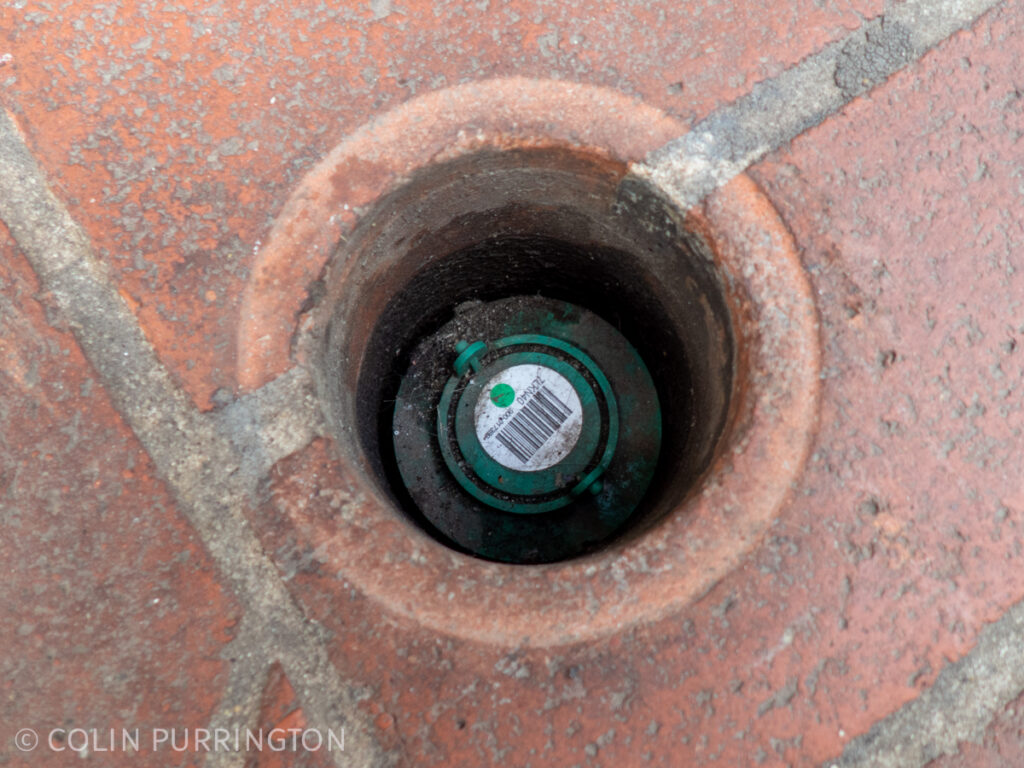
The plates are remnants of Operation Full Stop, a USDA-led project that was funded in 1998 by a $5 million earmark in the Federal budget. Part of the funding was to develop a bait system that would deliver poisons to deserving termites in a 15-block area of the French Quarter. Inside a 3″ hole drilled into the sidewalk and deep enough to reach the soil level is a bait station supplied by Terminix. I think the station is manufactured by Sentricon and included a chitinase that killed the termites by preventing their ability to molt. Here’s a bait station inside a hole that was missing its cap plate:
The cap plate is a rather clever device that makes a water-tight seal as the snake eye bolt on the plate is tightened. It was the brainchild of the late Edgar S. Bordes, Jr., I gather.
Per Martin 2016, this baiting effort caused a reduction in termite populations from 1998 to 2011, the year the funding ran out. And most of the ~3000 homeowners that received the bait stations have opted to pay a pest-control service to maintain them. But this article implies that many of the termites are in the walls of homes and businesses and perhaps don’t regularly visit the ground level and so might not encounter the poisons inside the bait stations. Therefore, many homeowners are hiring specialists to examine their walls with infrared cameras, acoustical detectors, miniature radars, and snake scopes. If I invested in a home in New Orleans I would spend tens of thousands of dollars to buy all of those devices so I could monitor my walls whenever I wanted.
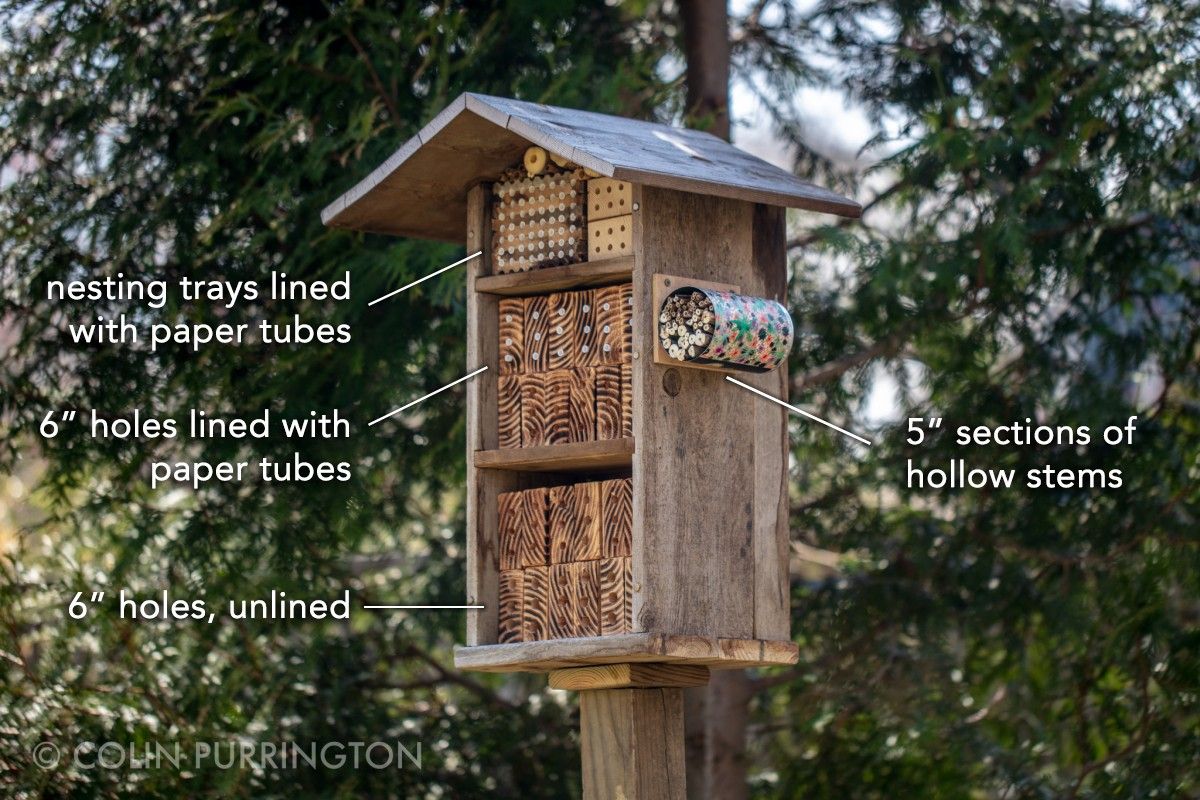
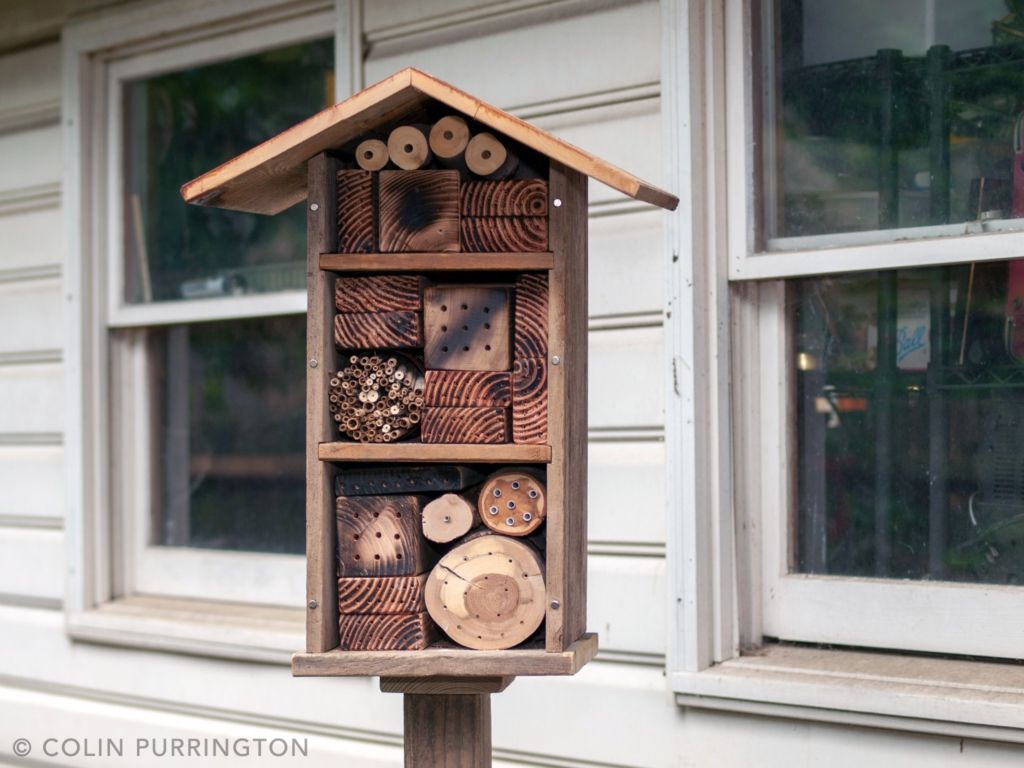
In nature, tunnel-nesting bees are perfectly happy to use logs riddled by boring beetles or piles of dead plants that have hollow stems. That habitat is often in short supply in many yards, however, so it’s necessary to provide hotels if you want to attract them. These hotels can be as simple as a large coffee can filled with hollow reeds … or as elaborate as the three-level one I built. The bees really don’t care.
Types of nesting material
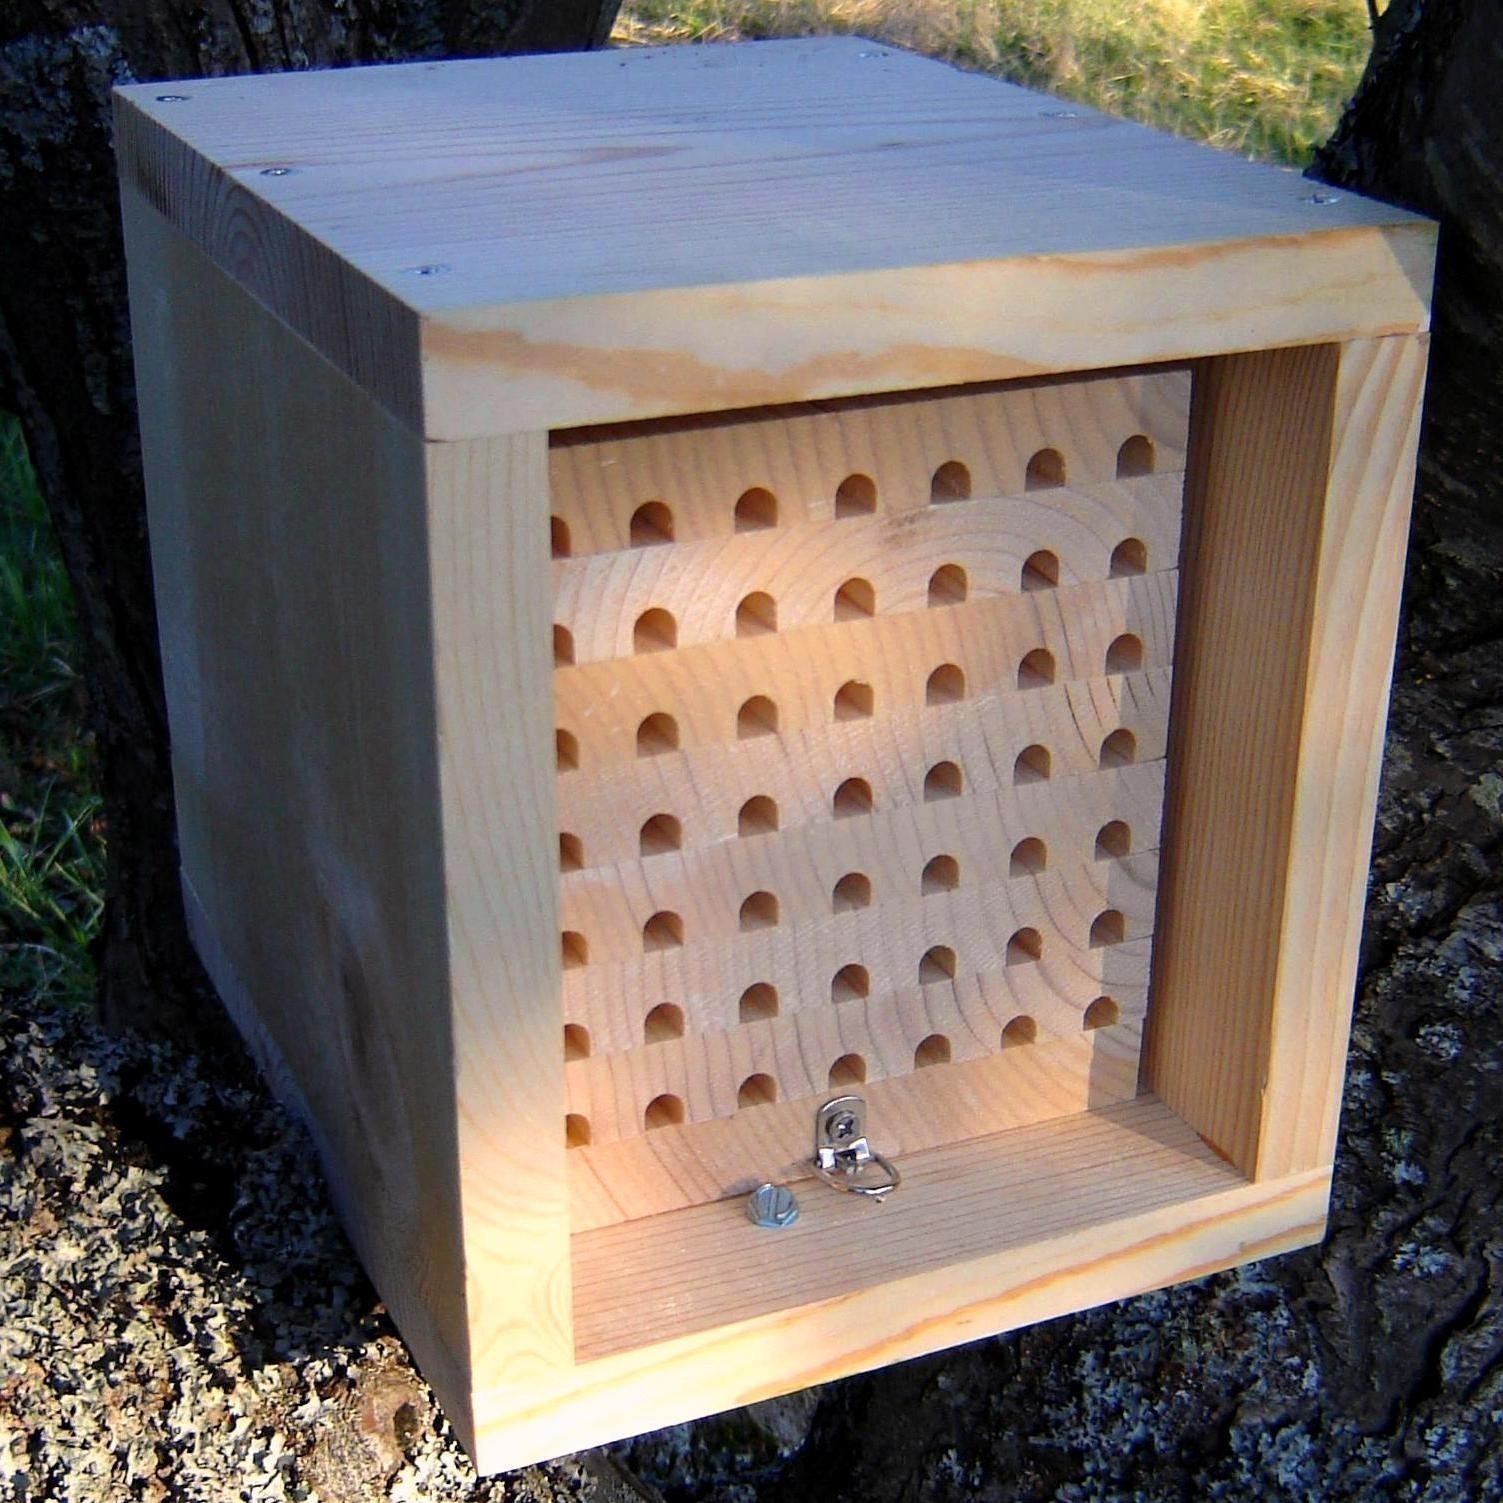
DIY bee hotels can be filled with routered nesting trays (you can buy these or make your own, if you’re handy), wood blocks with paper inserts (these inserts can be purchased), wood blocks or logs with drilled holes (unlined), or just sections of hollow stems (by far the easiest). Or, like house in the photo below, a mix. A hotel should have a roof to keep the tunnel entrances relatively dry, should be situated to get morning sun, and be approximately 5 feet off the ground (so you can enjoy watching them).
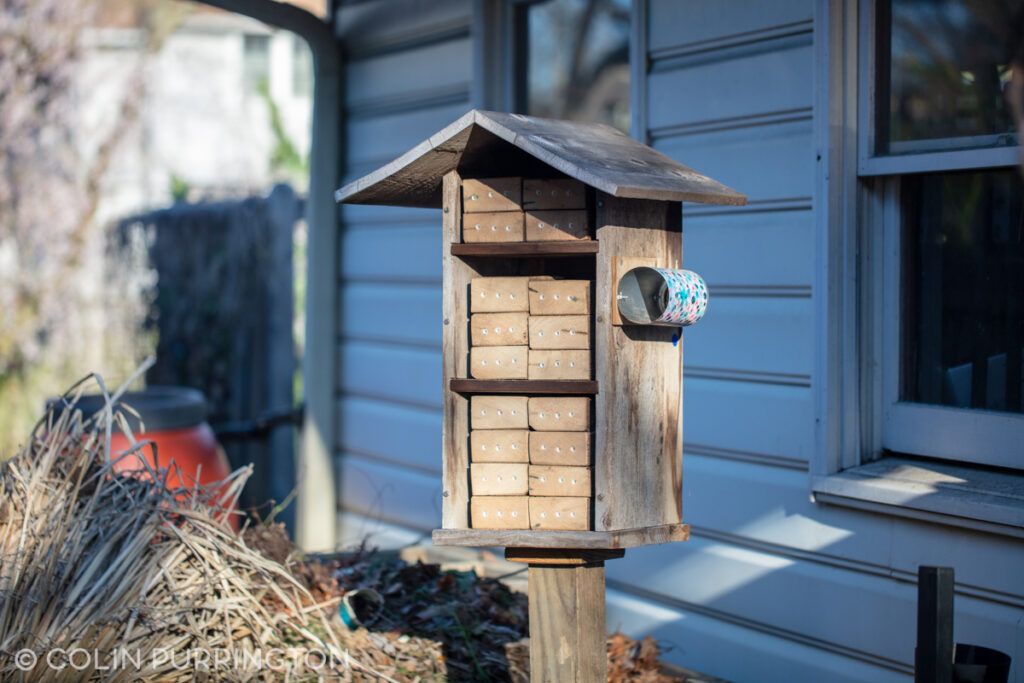
Below is a photograph of my other hotel. It’s smaller and is set up in my front yard to entertain people who walk by. Tunnels are all unlined drilled holes, plus milkweed stems. Holes in the blocks are varied because I want to attract a variety of solitary bees.
Swap nesting materials regularly
The ideal bee hotel is one that allows all the nesting material to be removed each year (or so). By installing fresh nesting material, new tenants each spring will get to move into tunnels free of kleptoparasitic pollen mites and pathogenic fungi. Another benefit of removable nests is that you can remove sections as they get filled, allowing you to replace the spot with the same type of tunnels or with tunnels that have different diameter to cater to a different bee species (there are hundreds). Below are examples of my hotel with different configurations (my 2020 version, on right, is a bit boring).
Emergence boxes
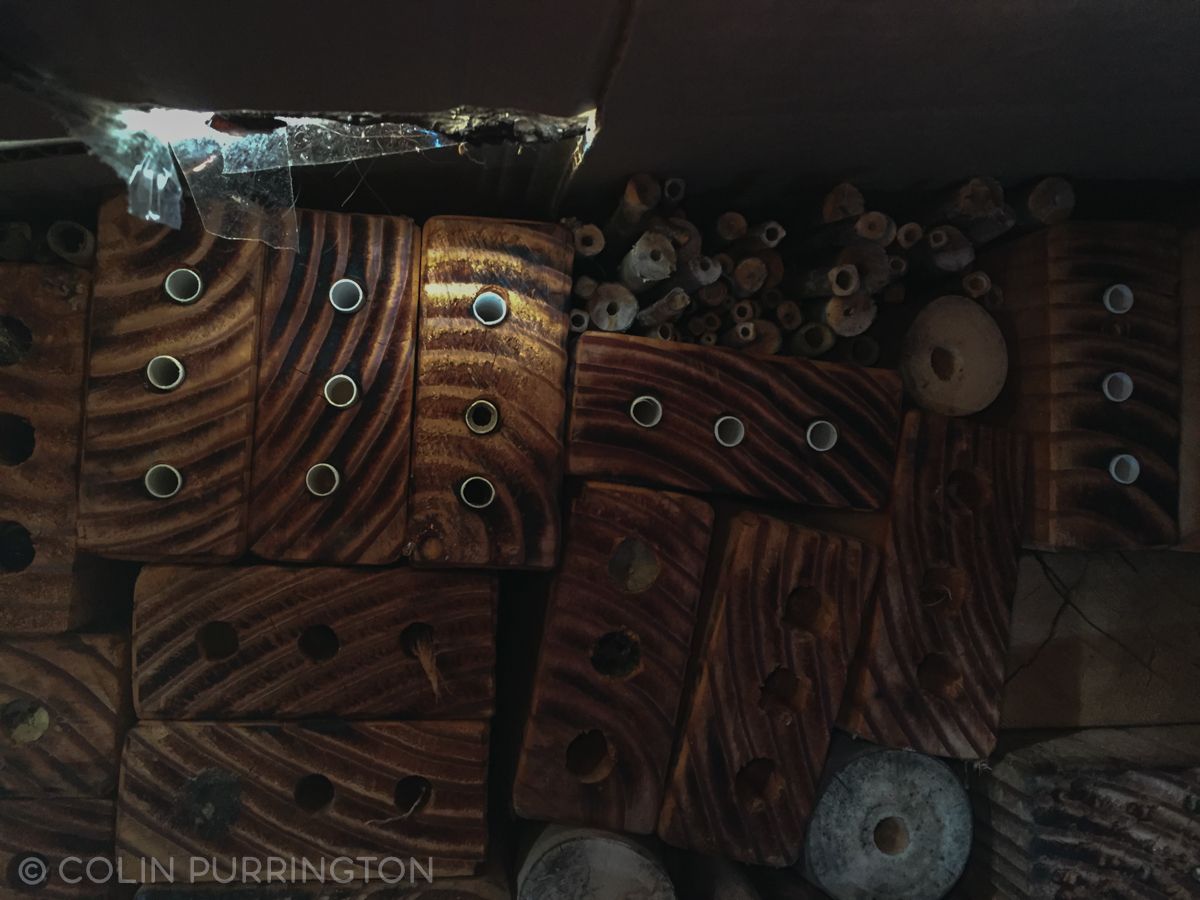
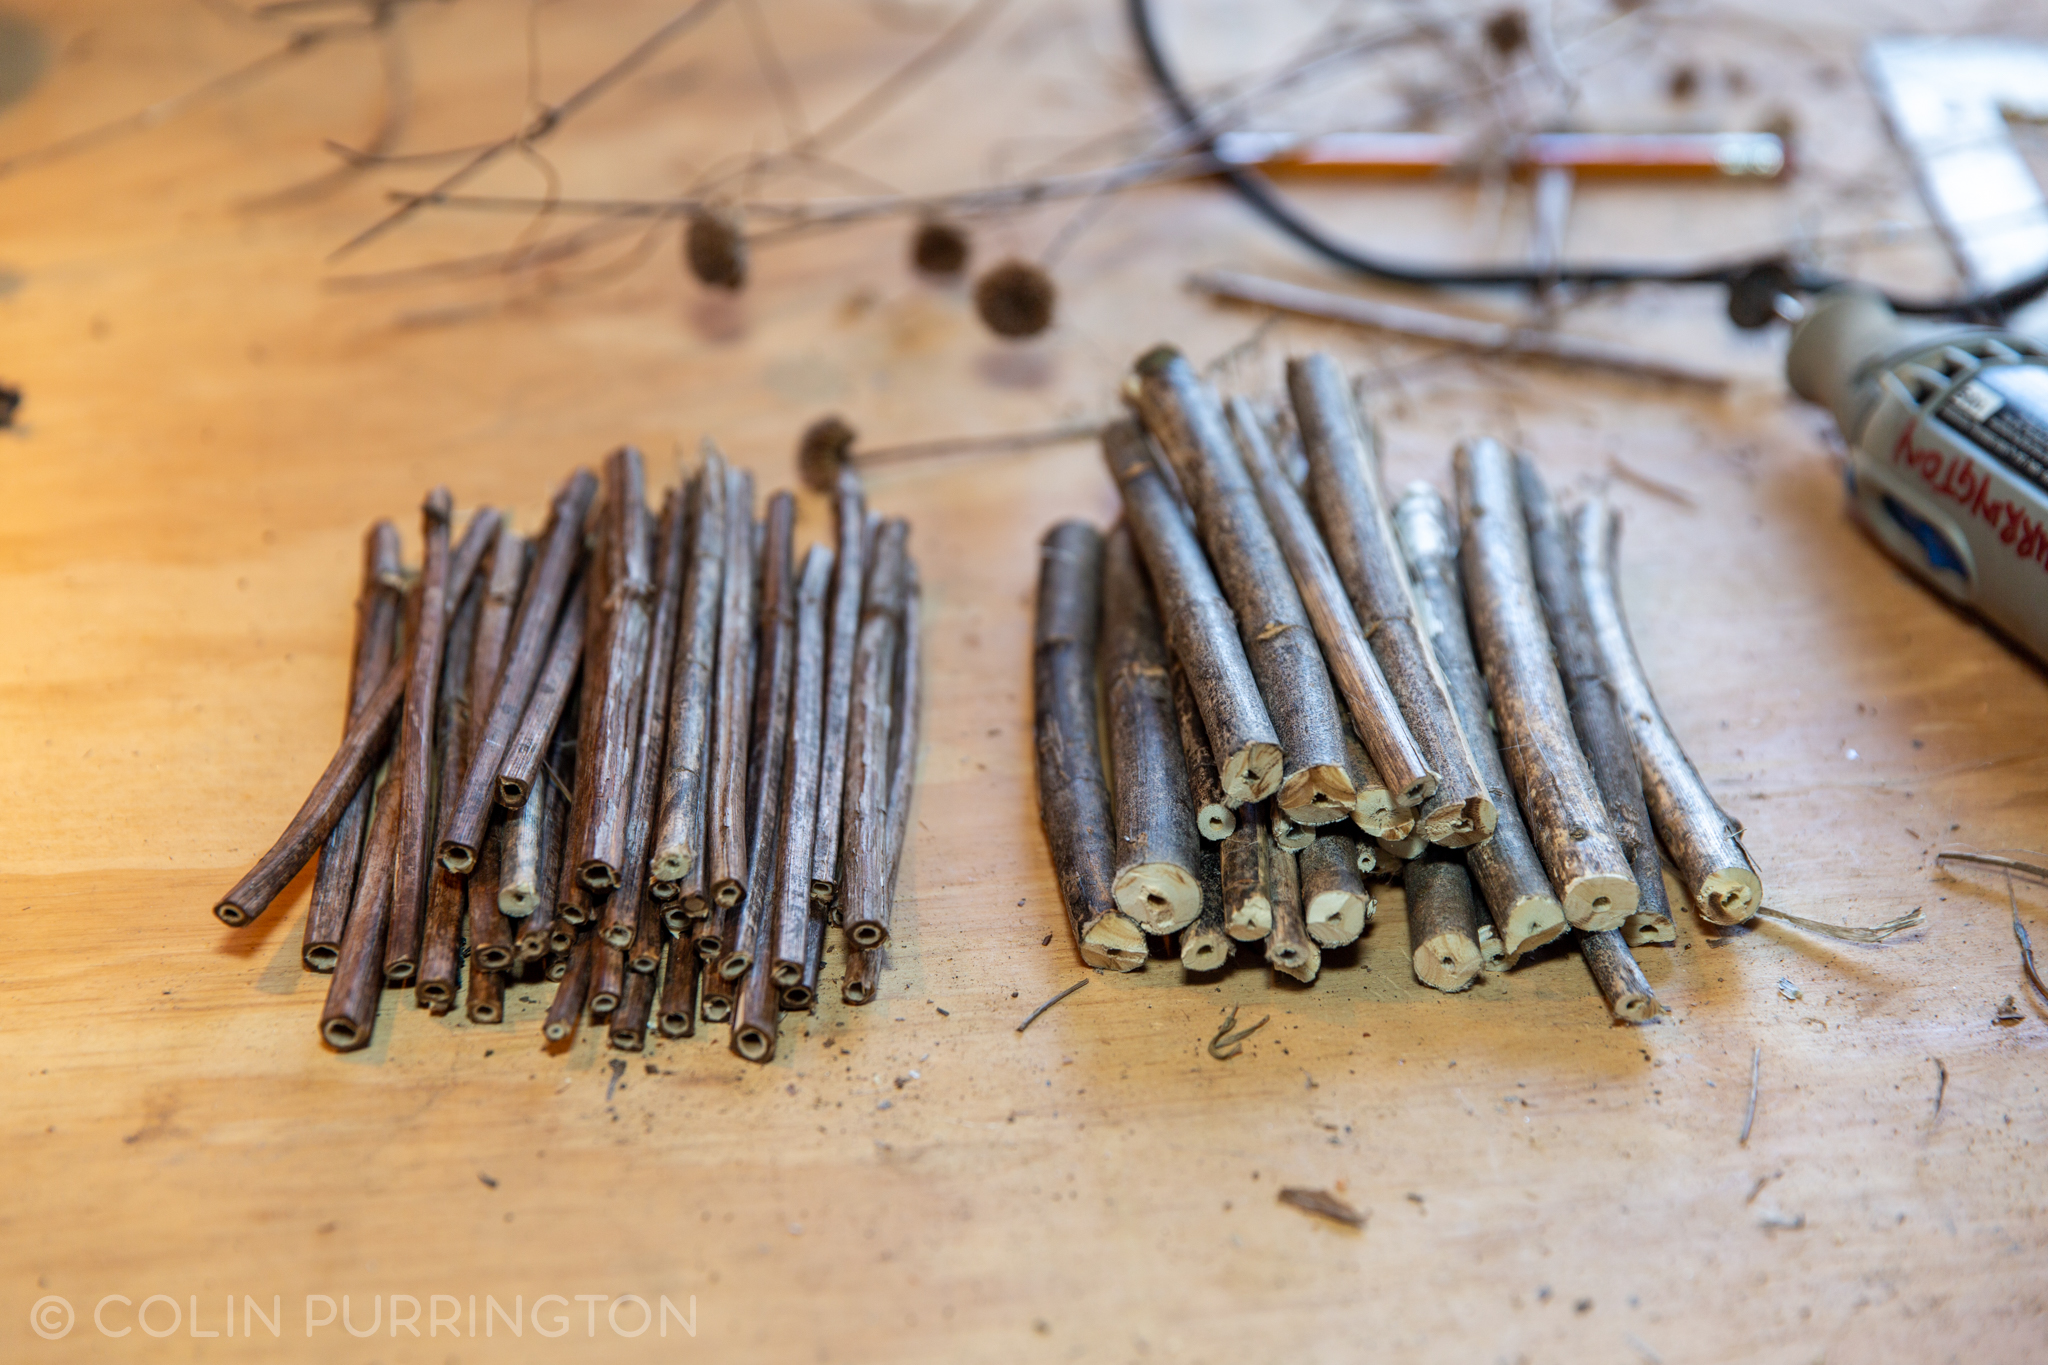
What do you do with the nesting material after you remove it from the hotel? I put mine into a large cardboard box that has holes in the sides and at the top, then store in my unheated garage for the winter. In mid March (before bees in my area start to wake up) I put the box outside in a spot that is dry and gets good morning sun. Then when bees emerge from their cocoons they can escape from the box but are disinclined to re-inhabit the nesting tunnels they emerged from. Here’s a view of the nesting material inside my emergence box.
After several months outside (e.g., in August, long after the last resident has emerged) I take everything back into my shop and redrill holes and sterilize the wood. Then I can reuse blocks in future years.
Cleaning pupae
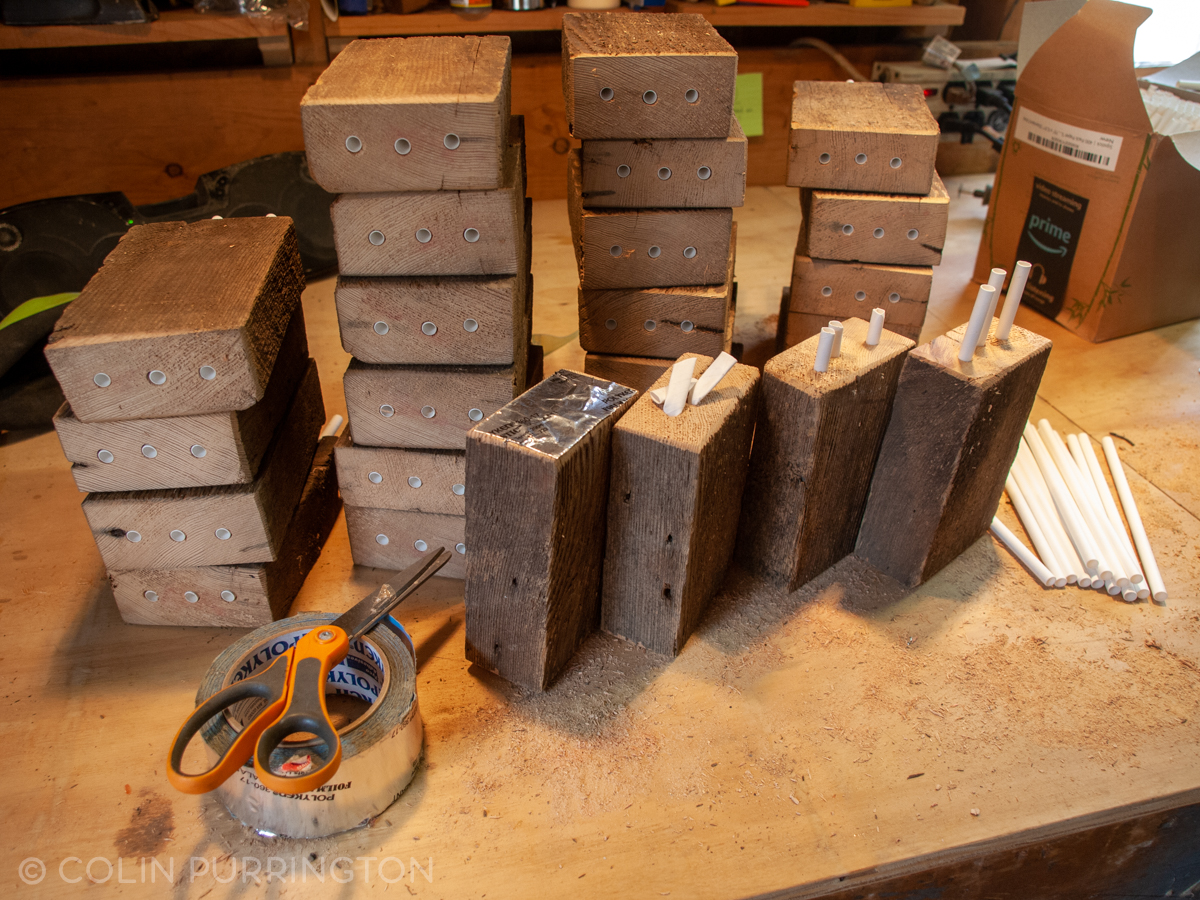
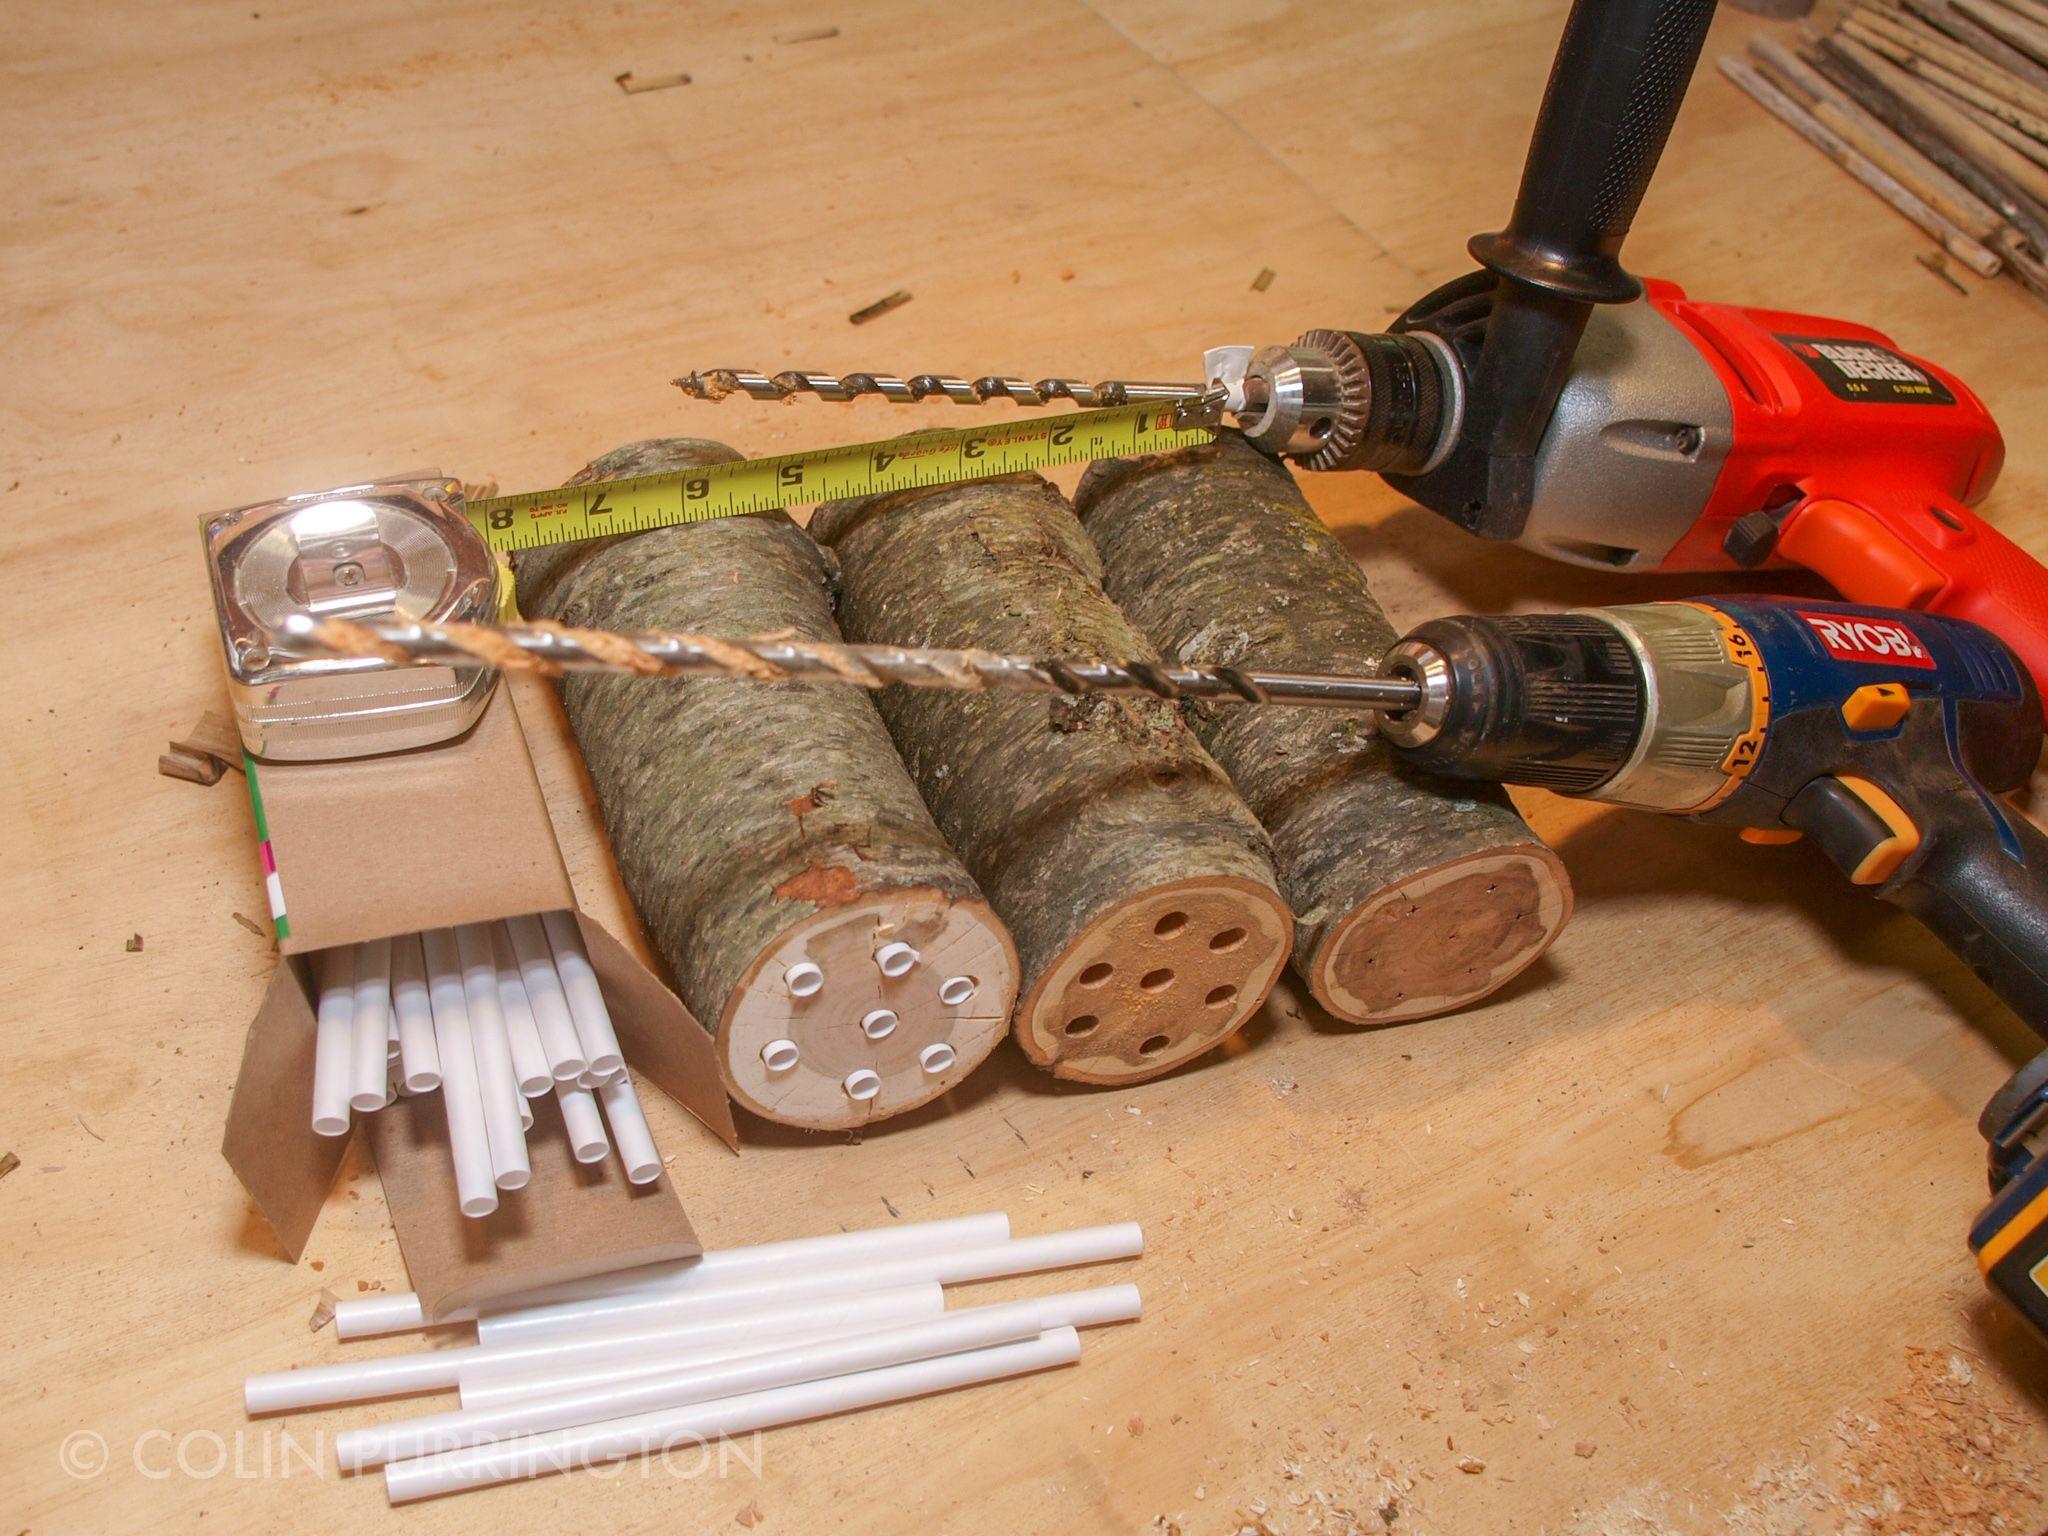
Lately, I’ve been thinking that I should move entirely to a system where I can sort through pupae at the end of the season. E.g., as summarized here. The reason for this is that I’d like to remove (kill) the kleptoparasitic mites (pic) and Houdini flies (pic) that are likely destroying many of my solitary bees. To enable this process I am going to start using paper straws to line all the tunnels. These straws can then be removed and unwrapped and the contents examined. Below is a photograph showing how drilled holes can be lined with paper straws — just fold over the back overhang and seal with foil tape.
Several companies sell sturdy (and easy to unwrap) paper straws as well as cardboard tubes that can easily accommodate the straws (i.e., you don’t need to drill holes in wood).
Another way to sort through pupae is to use routered wood trays, which you can buy or make (with a router or a table saw). Although some types of trays are better used with straws (to prevent mites from moving from tunnel to tunnel), others fit snuggly enough to be used without them. On my list of things to do is to make some routered nests that are sealed on one side with Plexiglas so that I can observe the bees within (such hotels can be purchased, and are beautiful).
Design tips
To keep everything dry on something this tall you need a generous roof overhang. Mine extends 5 inches beyond the front of the shelf, plus the wood sections and reeds are set back from that by another inch or so. If you have a shorter house you can have a smaller roof.
For larger hole sizes you want, ideally, 6 inches of depth. Shorter (4″) tunnels are fine but can result in a male-biased brood sex ratios. If you want to encourage population growth, encouraging the production of females is important. So buy long bits (I really like my 5/16″ auger bit, shown in drill below).
Burning the front of the wood allows bees to more easily find their holes, plus the darker surface causes the wood to heat up faster in the morning sun.
Avoid treated lumber or fresh cedar. Per rumors on the internet, those types of wood can result in the death of the larvae. Pine is fine but I think harder wood is preferable because the drilled holes tend to be smoother.
For cutting reeds to size, I highly recommend using a cutoff disc on a Dremel tool instead of pruners. You can get a really smooth surface with a Dremel.


