
I’d heard of ice spikes before — those strange horns that grow out of ice cube trays. And a quick internet search pulls up the rarer ice pyramid, too, like this one. But I’ve never heard of a trapezoidal prism being reported, but that’s what I found in my wheelbarrow recently. It was extremely smooth and organized, plus was thin-walled and filled with liquid water. I’m not at all confident the formation is even related to ice spikes and such. I’m sharing photographs and videos in in case anyone can tell me more.
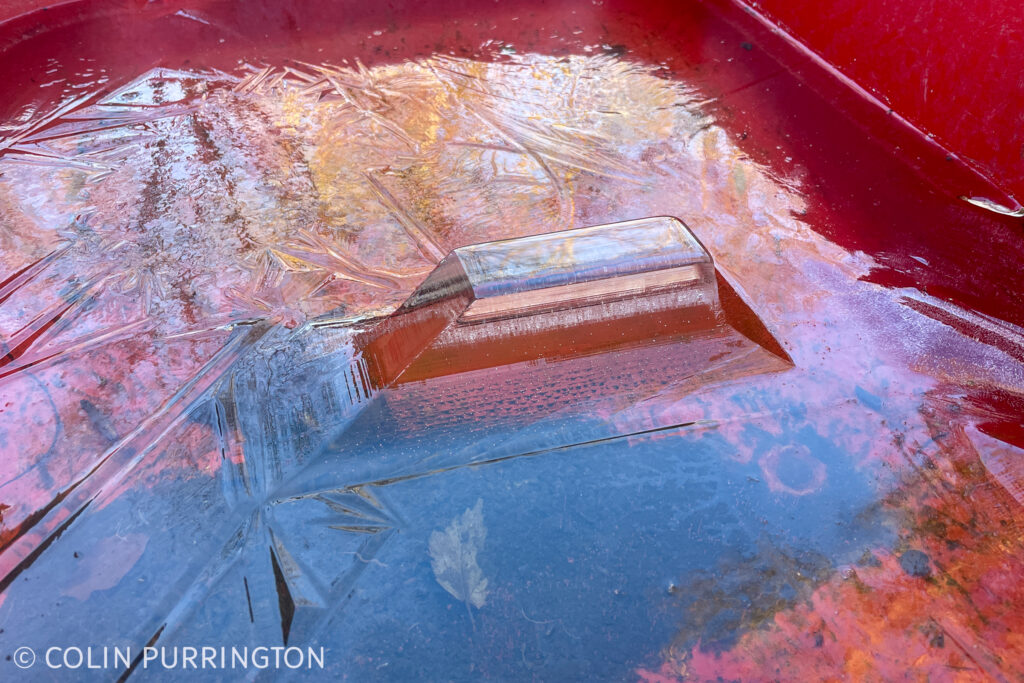
I’d estimate its dimensions at 4″ long, 1 1/5″ wide, and 3 1/2″ high. The temperature the night before dropped to approximately 26 °F. Below is some video footage from different angles, plus shows that the structure is filled to the top with liquid water.
After another cold night it formed a cap and lost most of its liquid filling.
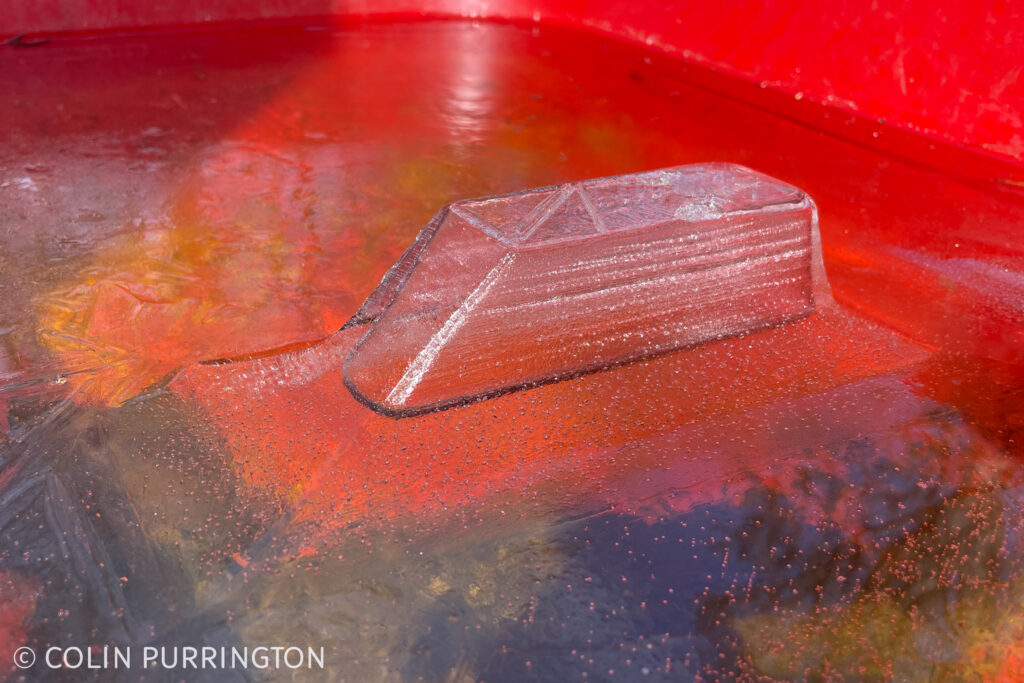
And on the day after that, the roof started to break apart.

If anyone can explain to me how it formed, I’d be grateful.